Showing posts with label Recipes. Show all posts

Thursday, July 21, 2016

Wellesley Bundt Coffeecake


Scott came home today with the Wednesday Recipe in the local newspaper, The Cleveland Plain Dealer.  This recipe was actually one where I had all the ingredients.  I thought why not and give it a try.

It's a pretty straight forward recipe and not hard to follow.  I think the only recommendation is to cook it a little longer than what the recipe said.  Other than that, it's outstanding.  It's moist and melt in your mouth.  Buttery and Sweet.  I don't think is the typical coffeecake.  It's a bit heavier than most coffeecakes but so good and dense in a sense.  I loved the filling, like a cinnamon roll.  I also used Brown Sugar instead of regular sugar in the filling as written in the recipe below.  I added some cinnamon into the batter to just give a little more cinnamon kick but you can skip that if you'd like.

I baked mine into a bundt pan but the recipe didn't state whether to bake in a 9x13 pan or a bundt pan.

I really love the taste of it.  The whole family loved it so it's a winner and added to my list of recipes.  I think the newspaper however needs to recheck their writing on how to completely write a recipe out.

If I had to describe this cake it was like eating a cake, a cinnamon roll and a donut all in one.  Yes, it was that good!  So if I had to call it something, I guess I would call it a Cinnamon Roll Coffeecake.  Perfect to serve at Breakfast, Brunch, Coffee or Tea or as a dessert after dinner.  This would be great for any Tea Party!

Wellesley Coffeecake
1 cup butter, softened
2 cups of sugar
2 eggs
1 cup of sour cream
1/2 teaspoon vanilla
1/2 teaspoon almond extract
2 cups sifted flour
1 teaspoon baking powder
1/4 teaspoon salt
Sprinkle of Cinnamon (optional)

Filling:
4 teaspoons brown sugar
1 cup chopped pecans
1 teaspoon cinnamon

Preheat oven to 350'F
Thoroughly Grease and Flour Bundt Pan.

Cake Directions:
Cream Butter and Sugar.
Add Eggs, one at a time, beating with each addition.
Add Sour Cream, vanilla and almonds extracts, sprinkle of cinnamon (cinnamon optional); beat well.
Sift together Flour, Baking Powder and Salt together and add in wet ingredients.

Filling Directions:
In a separate bowl, combine sugar, pecans and cinnamon.

Assembly:
Place 1/3 of batter in prepared bundt pan.
Sprinkle with 3/4 of filling mixture
Spoon in rest of batter and sprinkle with rest of filling on top.

Bake for 1 hour until toothpick inserts comes out clean.

When cake is cooled, either dust with powdered sugar, leave plain or glaze it with the following glaze recipe.

Vanilla Butter Glaze for Cakes, Cinnamon Rolls and Donuts:
2 Tablespoons Butter, Melted
1 Cup Powdered Sugar
1 Tablespoon of Milk or Heavy Cream
1/4 teaspoon Vanilla Extract

Directions:
Sift powdered sugar into a bowl.
Add the melted butter.
Add 1 Tablespoon of milk or cream.
Mix in Vanilla Extract.
Beat until smooth and creamy, adding more milk if necessary.
Drizzle over cake, cinnamon rolls or donuts.

OH MY OH MY, WAS IT YUMMY!

Sugar & Spice and Everything Nice!
Annamaria

Pasta Carbonara

My daughter's dish, see the fresh grated cheese?  Served with great New York Brand Texas Toast 4 Cheese Garlic Bread!  Yum!

*Sidenote:  I am reposting this from my old blog.  Transferring it to anyone who moves onto here.  I love going back to these old posts because I get to also my babies when they were babies.  See last picture, he still looks the same just older....excuse me while I hide under the covers and sob because my little man is about to be 7!

We always have Bacon in the house.  My husband says that Bacon has to probably be the best pork product ever created.  I would say Bacon is pretty darn awesome.  I hate making it and dodging oil spits but really nothing beats perfectly cooked bacon....  Welllllll maybe Pasta Carbonara beats the lone Bacon....

One of the reasons why we ALWAYS have Bacon in the house is because my family always asks me to make Pasta Carbonara.  It's definitely a staple in our home.  It's one of those comfort foods.  How the dish started is of a much talked about subject.  It's often said to have started in Rome and is definitely most likely a Northern Italian dish.  It was made more on a family level with it's easy access ingredients.  Also "Carbonara" means "Coal Burner/Worker".

Now yes, I could of use Pancetta, but I didn't.  I could, I should, I would of but are we really going to argue that bacon is a bad thing to replace Pancetta.  If you did want to use Pancetta, you do the exact same steps just replace the bacon with Pancetta.

Funny thing is I actually have family on my mom's side in Italy named Carbonara and when I make this dish I think of them often when making this dish.  My mother's sister and my cousin's all live in Rimini, Italy.  It was my Uncle's last name obviously.  I miss them very much!  This recent cooking experience made me recollect my last visit to Italy and visiting family.  Not too long ago my cousin passed away who is a Carbonara and it made me feel a little happy and sad thinking of how he was so nice and also thinking how I feel bad for him and family.  That's the hardest when you have family overseas.  You can't run by their side when something bad happens.  You can't run and give them your support.  My mother's whole family is in Italy and it's very hard for her.  As it also is with my dad's side of the family.  As my dad was the first to pass among my dad's siblings, I know how hard it is that they couldn't be here for us.

"Mangia Bene" (Eat Good")
A photo of an aged man possibly a Coal Worker eating Carbonara! =)

I have to say when I make this dish I always make a lot!  Enough to last us the next day.  I sometimes think the flavors stick onto the pasta more the next day.  It's great just reheated with some freshly grated Parmesan!  Mmmm, it's sad when it's gone, we all look at eachother with a sad face....  Seriously we do!  LOL!

I have this picture in my kitchen.  I think it's whimsical and playing with your spaghetti is super fun!

Now I've said this before, I can't enforce it more PLEASE use fresh grated Parmesan Cheese.  I's worth it.  You don't have to purchase a huge piece but it beats the stuff on the store shelves that come in a shaker!!!!  It certainly completes taste in any dish!  Store your Parmesan Cheese wrapped tightly in plastic wrap and then in a ziploc bag.  The cheese is not that great when it dries out.

A Comical Italian Parmesan Cheese Poster

Now we get to the recipe....

This isn't a very saucy dish.  It's simple, enough flavor and you can add sweet little peas in it if you'd like which also adds a great color.  This time I didn't have any peas on hand and you can use the frozen kind and cook them right along your pasta when it comes to a boil.

I use Thin Spaghetti primarily Barilla Products.  I love Barilla Pasta.  You can use what you like.  Using Thin Spaghetti noodles is perfect for this dish.  A light sauce pairs perfect and it has enough hold up with the tossing where if you used Angel Hair it would fall apart and can cook rather quickly and turn into much.  The regular Spaghetti noodle can be use however I think it may not hold or soak up the flavors since it is thicker. This is my preference and I have used all  types of Spaghetti noodles and I find Thin Spaghetti to be the best for Pasta Carbonara.

Pasta Carbonara
7 Eggs
3/4 cup or more of FRESHLY Grated Parmesan Reggiano Cheese
Dash of Pepper
Dash of Garlic Powder
Frozen Peas (optional)
1/4 cup of Heavy Cream or Milk (also optional)
2 Boxes of Thin Spaghetti
1 Whole Package (I Pound) of Bacon cut up in 1 inch pieces.

Directions:

Cut up your bacon.  This is what I do.  I cut the slab of bacon in strips without separating the individual slices of bacon.  Then I cute them in about a little bigger than 1 inch squares.  I throw it right in the pan.  I do this all with kitchen scissors.  The slices will separate as they cook and you stir it around.


Fill a pot with hot water and dash some salt in the water.  Bring to a Boil to prepare your pasta.  As you're waiting for it to come to a boil.....

Fry up your Bacon until browned crisp and still a little chewy!  Set them aside temporarily.

As your Bacon is frying your pasta will come to a boil and your pasta can be thrown in.  I take the box of spaghetti and lean it against the edge of my counter and break the noodles in half and then toss them off into the pot of boiling of water, my mom did it this way and I will not argue that process.  Add the frozen peas at the last 4 minutes of cooking the noodles.  When the noodles are thoroughly cooked (al dente) drain the pasta and throw it back into your pot you boiled the pasta in.

Add your bacon, grease and all.  Toss around with tongs or salad tongs.  Get it all around.

Whisk your eggs until light and frothy.  Add your Heavy Cream, optional.  Add the pepper and garlic powder and mix.  Lastly add your Parmesan Cheese.  Mix all together.


This is my Gingerbread Girl Mini Whisk.  I love using her all year round for quick whisking jobs!

Pour your egg mixture into the still hot noodles and quickly with your tongs toss around the noodles.  I usually do this in 2 steps.  Add mixture then toss, add rest of mixture and toss again.  Finito!  (Finished!)

You will end up with this, a big pot of Pasta Carbonara!
Mmmmmm, Bellissima!  (Beautiful!)

That my friends is how I make my Pasta Carbonara.  It's a quick dish and requires very little ingredients.  It's flavorful, comforting and so yummy.  I added Freshly Grated Parmesan to every plate.  To give it that extra touch!  We also had some prepared Garlic Bread by New York Brand that makes a Texas Toast.  It is so good and we like that brand the best.  End results, hungry bellies now full bellies!

We ended the night with some Chocolate Cake with Chocolate Frosting.  I topped it off with some non pareils.  Perfect ending to a great dinner.  Because ya know, it's so typical for Italians to end their meals with Chocolate Cake, okay maybe not, but in my house, it does sometimes!


Johnny enjoyed his piece of cake as you can tell he got it all over his face!


Then we rolled ourselves eventually to bed!

Buonanotte!  (Good Night)
Annamaria

Wednesday, July 20, 2016

The Best Vanilla Glaze

Yummy Glaze!

This has to by far be the best ever glaze to use on just about anything that requires a glaze.  For instance, Donuts, Cakes, Cinnamon Rolls, Muffins, Scones, Cookies and more! It's just like that glaze on that amazing  fresh yeast or cake donut, or freshly baked cinnamon rolls.  You know how there is just not enough glaze in the refrigerated cinnamon roll cans?  Well make this instead and you will have yourself some gooey yummy cinnamon rolls.  It's great for that drizzle on Bundt Cakes.  The butter just gives it a comfort smoothness to the glaze and the milk/cream of course give it that creaminess along with the butter and the vanilla is a great flavor for it.  You can also use lemon extract, anise extract, almond extract, maple extract, rum extract....etc...  I like to use pure extracts if I can and if it's available, imitation is only a last resort.  Pure extracts are a little more expensive but really worth it and you can use one bottle a long way.  You get the real true flavor potency too.  So a little bit ago I made a Cinnamon Roll Coffeecake, which I used this glaze. It was perfect.  I am forever in love with this recipe.  Make sure you follow the directions exactly to get the best smoothness possible, or you can always send it through a mesh strainer to get the lumps out from the powdered sugar.  Make sure to sift it the powdered sugar.  Enjoy and if you do use this glaze please give me your feedback!

Vanilla Butter Glaze for Cakes, Cinnamon Rolls and Donuts: 
2 Tablespoons Butter, Melted
1 Cup Powdered Sugar
1 Tablespoon of Milk or Heavy Cream
1/4 teaspoon Vanilla Extract

Directions:
Sift powdered sugar into a bowl. Add the melted butter. Add 1 Tablespoon of milk or cream. Mix in Vanilla Extract. Beat until smooth and creamy, adding more milk if necessary. Drizzle over cake, cinnamon rolls or donuts.

Have A Sweet Weekend!
Annamaria

Ham & Swiss Calzone & Roll Ups


Were you ever so hungry but you just didn't know what to make?  Nothing could be easier than this crescent calzone.  I mean, it felt like it took me literally 5 minutes to make.  Took me longer to take the pictures than the actually assembly of it.  What I ended up having was this AMAZING, WARM, FLAVORFUL, GOOEY, CHEESY and YUMMY dinner.  Now I was satisfied with just this but if you were to turn it into a meal for like 4 people, I'd double the recipe and make a salad or some potatoes like French Fries, Roasted Potatoes, Mashed Potatoes or whatever, even a veggie too.  I went solo on this one.

So basically it was just taking my lunch meat, cheese slices and rolled it up in a non-perforated recipe ready crescent roll sheet.  I've done step by step photos with instructions.  I have to mention, I used Baby Swiss in this recipe, My favorite is Guggisberg Baby Swiss.  I love it because it melts perfectly, it's creamy and the perfect taste.  It's not a harsh hard Swiss that many people are used to.  So if you kinda have a love & hate relationship with Swiss, I would try this Guggisberg Baby Swiss.  You will not be disappointed, at least I wasn't.  If you don't like Swiss AT ALL, you can certainly use another cheese and if you don't like Honey Ham, you certainly can swap it out for any other lunch meat, or cooked steak or chicken sliced thin.

THIS RECIPE MAKES ONE Calzone enough for 2 people

Honey Ham & Baby Swiss Crescent Calzone
1 Refrigerated Pillsbury Recipe Creations Crescent Dough or Crescent Roll Dough with Perforations Sealed
1/2 Pound Honey Ham or Any Lunch Meat or Thinly Sliced Cooked Meat (Steak, Chicken or Pork)
1/2 Pound Sliced Baby Swiss Cheese or Your Favorite Sliced Cheese, you can also used Shredded Cheese.
Any Spread like Ranch Dressing, Mustard, Honey Mustard, Thousand Island Dressing, Italian Dressing
(I wouldn't use mayo inside, while baking it could get icky, I would slop it on while you eat it or in a dipping cup.  You can also skip this step completely)
You can certainly add some veggies too if you'd like, like Sauteed Mushroom, Peppers, Roasted Red Peppers, Pepperoncini or Onions, etc....  (If adding veggies do so on top of the cheese).

Preheat Oven to 350'F.

Line a Baking/Cookie Sheet with Parchment Paper.

First Step is to unroll your crescent dough and stretch it out a little but do not tear it.  Just to get it out of it's tight form from being in the can.

Lay your lunch meat down or your cheese down first, (I think this worked better the second time around, helps not to make the dough soggy).

Add your sliced or shredded cheese on top of the lunch meat.  Leave about a half inch space so that you can pinch close.

Start at the long end and begin rolling to the end.  Pinch all opening together.  Snip with a scissors or poke top with a fork to do some venting.  Cook until a Golden Brown, it varies depending on temperature but I checked it about 15-20 minutes in.  You may see some cheese oozing.  That's completely fine!  Means it's hot and cheesy!  =)

Important step is to let it set up before cutting because if you don't it will just smash and fall apart.  You want some stability while eating this.

I hope you enjoy, we sure did.  I think I just thought up my most versatile recipe yet.  It might of been made before by others but hey for me, I thought of it!  ;)

Stay tuned for my sweet dessert version using this method....Can you guess what I might use?  Here are some photos....

Before laying the lunch meat down or cheese down, this is when you add your spread lightly and gently over your crescent dough.
This is when I put down the cheese first over the stretched crescent dough.

Secondly, place your lunch meat or cheese down, whichever way you do it.
This is when you can add your veggies.

Start at the end and start rolling....

Finished rollings, do small snips, just a couple on the stop or poke with a fork to vent.

Bake in a 350'F oven for about 15-20 minutes until golden brown.  

Enjoy and I hope you make it.  Let me know how it turns out.  Don't forget to add some sides to complete the meal!  YUMMY YUMMY!


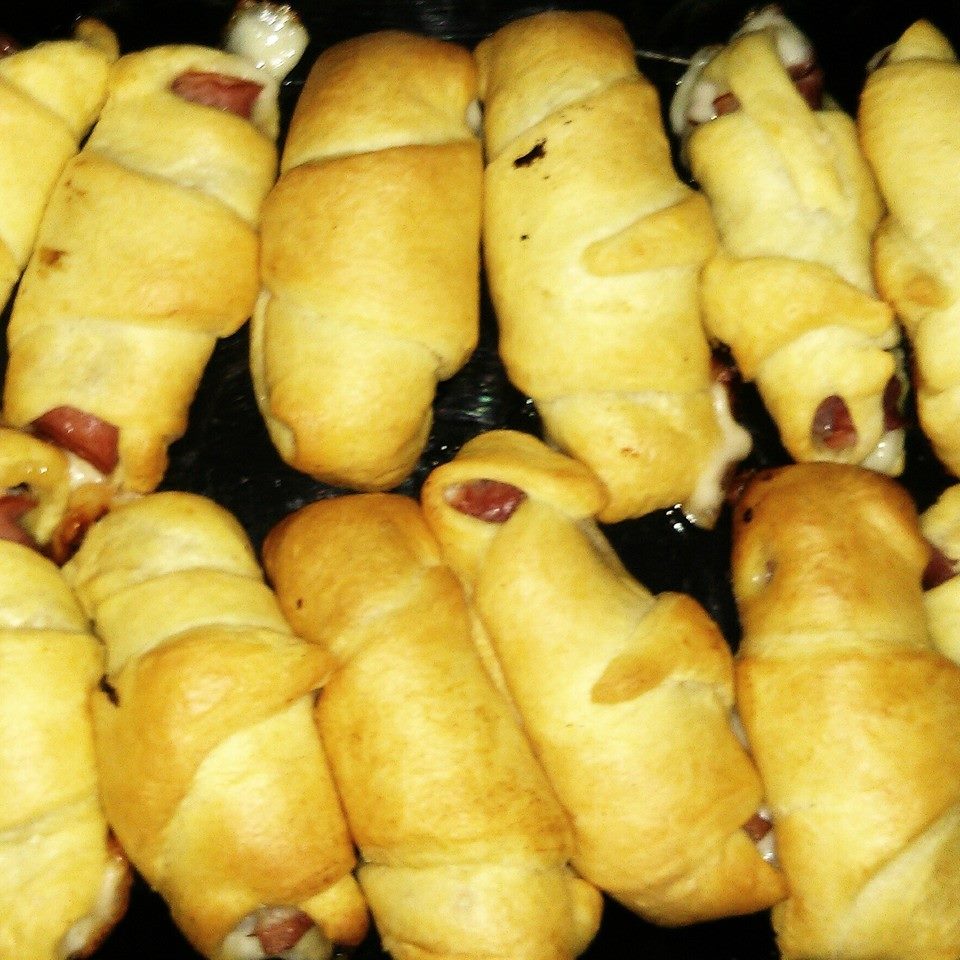
Update:  I have made these into rolls for individual servings for parties or appetizers!  A huge hit!


Mangia Mangia!
Annamaria

Wednesday, September 23, 2015

Happy Fall, Pineapple & Cherry Dump Cake, Yes Please!


*I'm reposting this recipe onto this new blog.  It's an oldie but goodie.  We still love it, it's quick, easy and tastes great, no it's not a 5 star restaurant dessert (Though I wouldn't mind it if it was on the 5 star menu), I got no time for that during nights that are crazy!  Cake Mix companies knew what they were doing!  I look back on these pictures and see my now Preteen still so little, my goodness has time passed!  Did I mention that my 2 year old mentioned in this post is now 6....Savor every moment in time....

Pineapple Cherry Dump Cake Dessert

My husband wanted dessert along with our feast we made for dinner, pork chops.  He wanted to make a quick cake with frosting (again), I'm a little tired of it and wanted something a little more homey and comforting.  Then I remembered, what sounded great was Pineapple and Cherry Dump Cake.  Mmmm, yes....  Fruity, Sweet, Crumbly and Buttery and then possibly ala mode?  My husband thought it sounded great (he's had it before but didn't remember).  It's such an easy dessert and should be made more often!

The first time I had it was at my mother in law's.  She made it when my husband and I were just dating.  Wow that was a long time ago.  Then I made it for a few Sunday dinners at my parent's house when we would all get together when my dad was still alive.  I always made dessert.  I think my dad loved this dessert.  We had similar dessert tastes.

So it's been awhile.  Wish I had some pecans but then I thought having no pecans for the kids was better, because they don't yet have the acquired taste for nuts in the raw.  My son doesn't like the texture yet, he's only 2.

I made a 9x13 pan of it and right now as I write this more than half of it is gone.

*There were nibblers (my husband and daughter) taking turns dipping the spoons in and eating it.   Sneaks! 

Then my husband made a huge bowl of it later and ate it ala mode!  I ate some later, had a smaller piece, didn't want to have it sit on my stomach before bed.

This is your basic Dump cake, but with the pineapple I didn't use tidbits.  I used pineapple pieces.  Larger size cut tidbits.  I like to get a good piece of pineapple.  I love pineapple!  I thought I had Cherry Pie filling in my cupboards but didn't, so my husband ran up to the store and got some.  He didn't get the Comstock brand which I prefer, he got some other brand I never seen or heard of.  What do you expect from someone who doesn't know.  But it still worked well.  Still prefer Comstock.

I also have to point out that this is something great to make with the kids.  They can pretty much make it themselves.  All you have to do is put it in the oven and take it out of the oven.  My daughter did this one with me.  She honestly did most of the work.  I am trying to rub off the love of cooking and baking to her.  So someday she'll have memories of cooking with me like I do with my mom.

So here it is...my daughter creating her first mostly on her own dessert.


Use a 9x13 glass or metal baking dish, here you can see I used my glass one.  I like this dish for cobblers and desserts.  Sofia is pouring both the juice and pineapple pieces in to the baking dish.  (no need to grease the dish).

Then Sofia added the Cherry Pie filling.

Here she is mixing it around.

We both sprinkled the cake mix on top and evenly distributed it.
See the heart shaped Barbie plate with the butter pats (butter cut into tablespoons).  So cute!

Sofia laid the butter pats perfectly, she's so proud and so is Mamma!
She loves posing with a Peace Sign gesture!  My little Bohemian!

*Look at the beautiful layers through the glass...

Baked at 350'F for 45 minutes and you're done!  Again they got to it before I could take a picture of it still whole!  At least they loved it!

This couldn't be a simpler put together dessert.  Kids can do it.  Although it seems so simple it tastes delicious and it's one of my favorite desserts.  Great for that last minute dessert too.  This is great ala Mode and I would think maybe a light drizzle of caramel topping on top of the ice cream would also be good with this.  This is best served warm and is also great reheated in the microwave.

My husband wanted to add chocolate chips but I stood my ground and said no, not everything has to have chocolate in it....  OH MY GOSH, Did I really just type that?  Shame on me!  But seriously if it was just the cherry pie filling then maybe it would of worked.  Or perhaps using chocolate cake mix instead with the cherry pie filling and adding chocolate chips.

PS:  You can use any pie filling.  I love Peach Pie Filling.  Apple Pie Filling works great too and would make a great Fall dessert and mixed in some cinnamon in the cake mix.  If you are going to just use pie filling then I would double up on the cans of it.  Maybe even a third?  Be creative!

You can also make Pumpkin Dump Cake too, just make the Pumpkin Pie Filling that you would use to make pumpkin pie, add that to the baking dish first then add the cake mix, pecans and butter on top.  I am making that next.  Will post when I do.  Mmmm!

Here's the recipe:

Pineapple and Cherry Dump Cake:
1 box of Duncan Hines Moist Deluxe Yellow Cake Mix
1 and a half sticks of butter cut into tablespoon pats  ( I didn't say it was healthy persay)
Comstock Cherry Pie Filling in a can.
1 (20oz) can of Pineapple Pieces from a can, I prefer pieces over crushed pineapple.

Preheat oven to 350'F.

Pour your Pineapple Pieces including juice into a 9x13 glass or metal baking dish.

Add Cherry Pie Filling

Mix just until fruit is well distributed.

Sprinkle all of cake mix on top of fruit.

Layer tablespoons pats of butter in oven.

Bake at 350'F for 45 minutes.

Serve warm.  Add Ice Cream and Caramel Topping as well as Whip Cream if desired.  Or just eat it out of the pan like my daughter and husband did...  That's how they roll....

Enjoy & HAPPY FALL!  YAY, FALL IS HERE!!!!
Annamaria